


Taps can leak for different reasons and it’s important to make sure you identify the correct cause of the issue. There are generally two things that need replacing in a leaking tap: the washer attached to the jumper valve, or the O-ring (a rubber ring that sits on the stem of the tap – you’ll see it when you dismantle the tap).
Generally if the tap is dripping it means the washer next to the jumper valve needs replacing, or if the tap is leaking water while it’s running, it’s probably a busted O-ring.
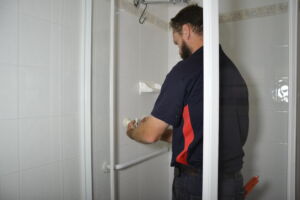
It might seem like a difficult thing to pull a tap apart and replace a washer or an O-ring, but it’s quite easy to fix dripping taps on your own, even without experience. Follow our step by step guide to see how to fix a leaking bathroom tap.
Find your nearest branch
The Right Tools to Fix a Dripping Tap
You will need a spanner or wrench for a leaking tap repair – it’s best to have an adjustable one for different sized nuts.
You might also need a set of pliers if your tap is stuck particularly fast.
You will also need a replacement washer or O-ring – make sure you buy one that matches the size of the one you’ve already got.
You can also buy a tap repair kit that should have everything you need.
Leaking Tap Repair Step by Step Guide
Step 1
Is your hot water tap leaking or dripping? The first thing to do is to identify the problem. If the tap is dripping after you’ve turned it off, you need to replace the washer next to the jumper valve. If water is leaking down the stem of the tap, or at its base, you need to replace the O-ring. The good thing is you can easily do both at once if you’re not sure.
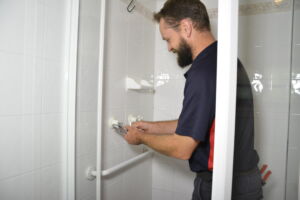
Step 2
You need to turn off the water supply at the mains. After you’ve turned off the supply, you should turn the tap on so that any water in the pipes runs out before you start.
Step 3
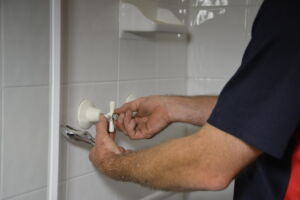
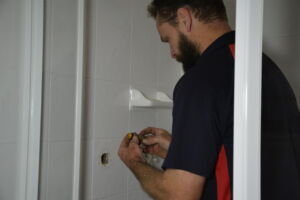
There will be a button or screw holding the handle in place – unscrew this first. That will free up the handle and you can take it off the stem.
Step 4
Now you need to remove the skirt or cover plate. Sometimes this will screw off, or just come straight off. It might also be held down by an adhesive, in which case you might need some pliers.

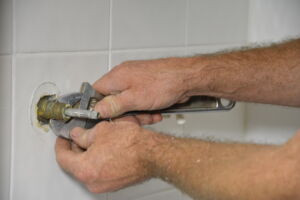
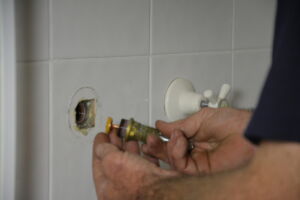
Step 5
Now you want to use your spanner to loosen the stem and take it out.
Step 6
You’ll see the jumper valve underneath the stem. Take it out and replace the washer with a matching-sized washer from the hardware store.

Step 7
Pick up the stem and loosen or cut the O-ring from the shaft, if required. Get a matching O-ring from the hardware store and simply roll it down over the stem into the same position.
Step 8
Having replaced the jumper valve and its washer, screw the stem back into the base on top of them. Put together the other parts with the same method. Try turning the tap on to make sure it’s all good.
Step 9
If you still don’t know how to repair a leaking tap, don’t worry! Call the experts at Australian Hot Water and we’ll ask one of our plumbers to help you out.


")


")


