


Taps can leak for different reasons, and it’s important to make sure you identify the correct cause of the issue. It might seem like a difficult thing to pull a tap apart and replace a washer or an O-ring, but it’s quite easy to fix dripping taps on your own, even without experience. Follow our step-by-step guide to see how to fix a leaking bathroom tap.
Key Takeaways
- Most drips are caused by a worn washer, ceramic disc, or mixer cartridge.
- Always isolate the water first and open the tap to relieve pressure.
- Check and clean the aerator—it’s a common cause of low flow and spray.
- Replace O-rings if water leaks around the spout or handle.
- If the tap is seized, corroded, or you can’t isolate water, call a licensed plumber.
Identify your tap type
| Tap type | How to spot it | Common fault | Typical fix |
|---|
| Compression (washer) | Turns several times to open/close | Drip at the spout | Replace washer + seat check |
| Quarter-turn (ceramic disc) | 90° on/off | Drip at the spout | Replace the ceramic disc insert |
| Mixer (cartridge) | Single lever mixes hot/cold | Drip at the spout or temp drift | Replace cartridge |
| Old spout leak | Water around base when running | Worn O-rings | Replace O-rings & grease |
| Low flow/spray | Spitty flow at one tap | Blocked aerator | Clean/replace aerator |
Before you start (AU safety & compliance)
- Turn the water off at the local stop tap or main water meter; test by opening the tap.
- For mixer taps on basins, isolate hot and cold flexi-hoses beneath the sink (if valves present).
- For hot taps, beware scalding—ensure the system is cool and isolated.
- Protect surfaces; plug the waste to catch small parts.
- For work beyond minor maintenance (e.g., modifying pipework), use a licensed plumber.
The Right Tools to Fix a Dripping Tap
You will need a spanner or wrench for a leaking tap repair – it’s best to have an adjustable one for different-sized nuts.
You might also need a set of pliers if your tap is stuck particularly fast.
You will also need a replacement washer or O-ring – make sure you buy one that matches the size of the one you’ve already got.
You can also buy a tap repair kit that should have everything you need.
Quick fixes by symptom
A) Dripping from the spout (most common)
If it’s a compression (washer) tap:
- Isolate water and open the tap to relieve pressure.
- Remove handle cap → screw → handle.
- Unscrew the bonnet/spindle assembly; lift out.
- Replace the washer (correct size), inspect the seat inside the body.
- If the seat is rough, lightly reface with a seat dresser.
- Reassemble with a touch of grease on threads; turn water on and test.
If it’s a quarter-turn (ceramic disc) tap:
- Isolate water; remove handle and trim.
- Unscrew the ceramic insert; match model/size.
- Install new insert; reassemble and test.
If it’s a mixer (cartridge) tap:
- Isolate hot & cold; remove handle (pop cap → grub screw).
- Lift off the dome/cover; unscrew the retaining nut.
- Pull out the cartridge; note orientation tabs.
- Clean cavity; push in new cartridge; refit nut, cover, handle; test.
B) Water leaking around the spout base or handle
- Isolate water; remove spout or handle as applicable.
- Replace O-rings on the spout/shaft; apply plumber’s grease.
- Refit and test; if leak persists, inspect for cracks or pitted surfaces.
C) Low flow, uneven spray, or noisy tap
- Unscrew the aerator at spout tip (use a cloth to protect the finish).
- Soak parts in vinegar to remove scale; rinse and reassemble.
- If still low, check isolation valves and flexi-hoses for kinks; for mixers, consider new cartridge.
D) Stiff operation or squealing
- For compression taps: remove spindle, clean threads, apply plumber’s grease, inspect packing.
- For ceramic/mixer taps: replace insert/cartridge—lubing won’t fix a worn disc/cartridge.
Illustrated Step-by-Step Guide
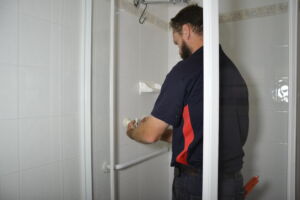
Step 1
Is your hot water tap leaking or dripping? The first thing to do is to identify the problem. If the tap is dripping after you’ve turned it off, you need to replace the washer next to the jumper valve. If water is leaking down the stem of the tap, or at its base, you need to replace the O-ring. The good thing is you can easily do both at once if you’re not sure.
Step 2
You need to turn off the water supply at the mains. After you’ve turned off the supply, you should turn the tap on so that any water in the pipes runs out before you start.
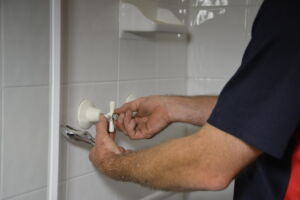
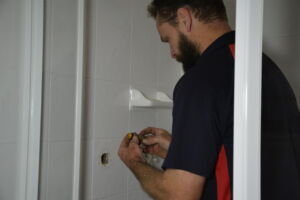
Step 3
There will be a button or screw holding the handle in place – unscrew this first. That will free up the handle and you can take it off the stem.
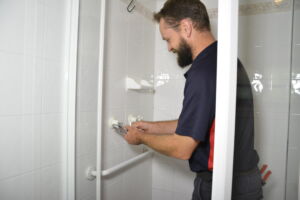
Step 4
Now you need to remove the skirt or cover plate. Sometimes this will screw off, or just come straight off. It might also be held down by an adhesive, in which case you might need some pliers.

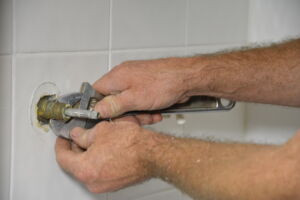
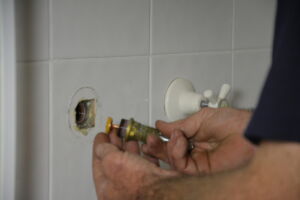
Step 5
Now you want to use your spanner to loosen the stem and take it out.
Step 6
You’ll see the jumper valve underneath the stem. Take it out and replace the washer with a matching-sized washer from the hardware store.

Step 7
Pick up the stem and loosen or cut the O-ring from the shaft, if required. Get a matching O-ring from the hardware store and simply roll it down over the stem into the same position.
Step 8
Having replaced the jumper valve and its washer, screw the stem back into the base on top of them. Put together the other parts with the same method. Try turning the tap on to make sure it’s all good.
Step 9
If you still don’t know how to repair a leaking tap, don’t worry! Call the experts at Australian Hot Water and we’ll ask one of our plumbers to help you out.
Take the old washer to a hardware store or match the model; sizes vary.
The seat is likely pitted; reface with a seat dresser or replace the insert/cartridge for non-washer taps.
Check for a hidden grub screw under a cap; apply penetrating oil and gentle rocking. Avoid prying that could damage finishes.
Quality cartridges can last 5 – 10 years, depending on water quality and use.
If your tap is fixed, great work! If it’s still dripping, seized, or leaking at the base, it’s usually quicker (and cheaper long-term) to have a pro replace the worn parts properly. Our licensed plumbers protect your finishes and test for hidden issues. When you’re ready, choose a time that suits you and we’ll get your tap running smoothly again.


")


")


")


